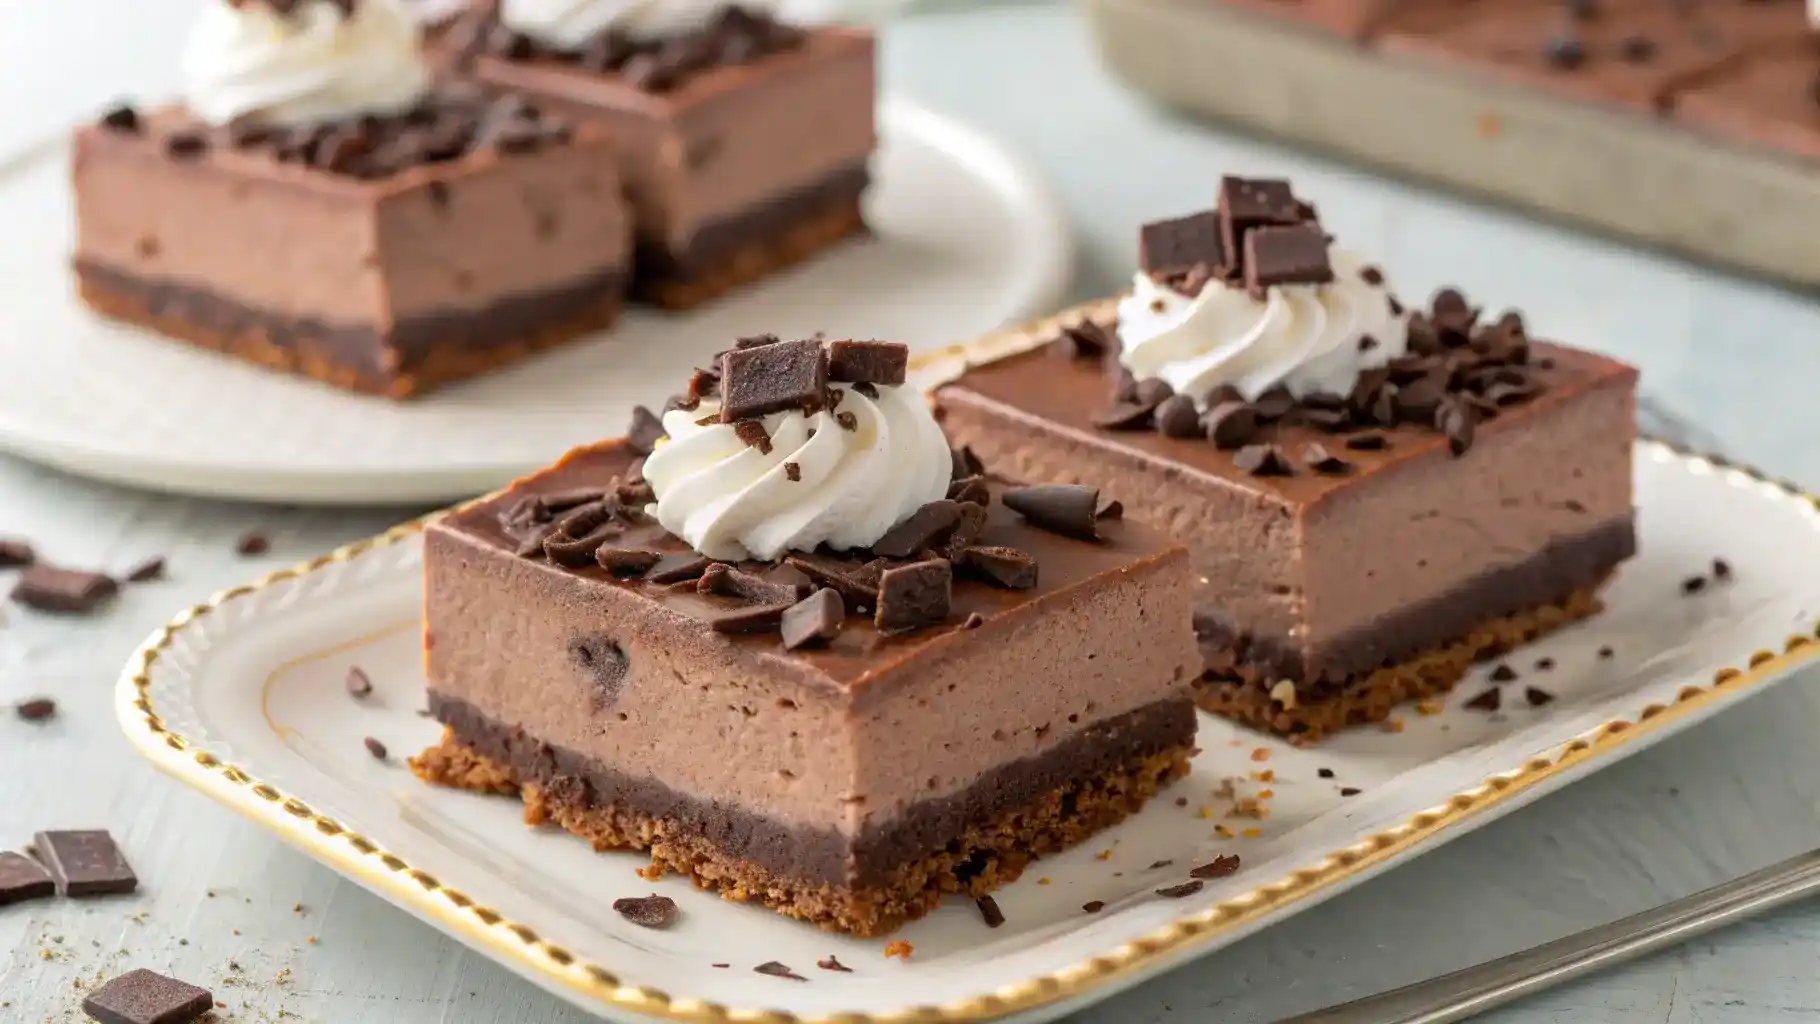
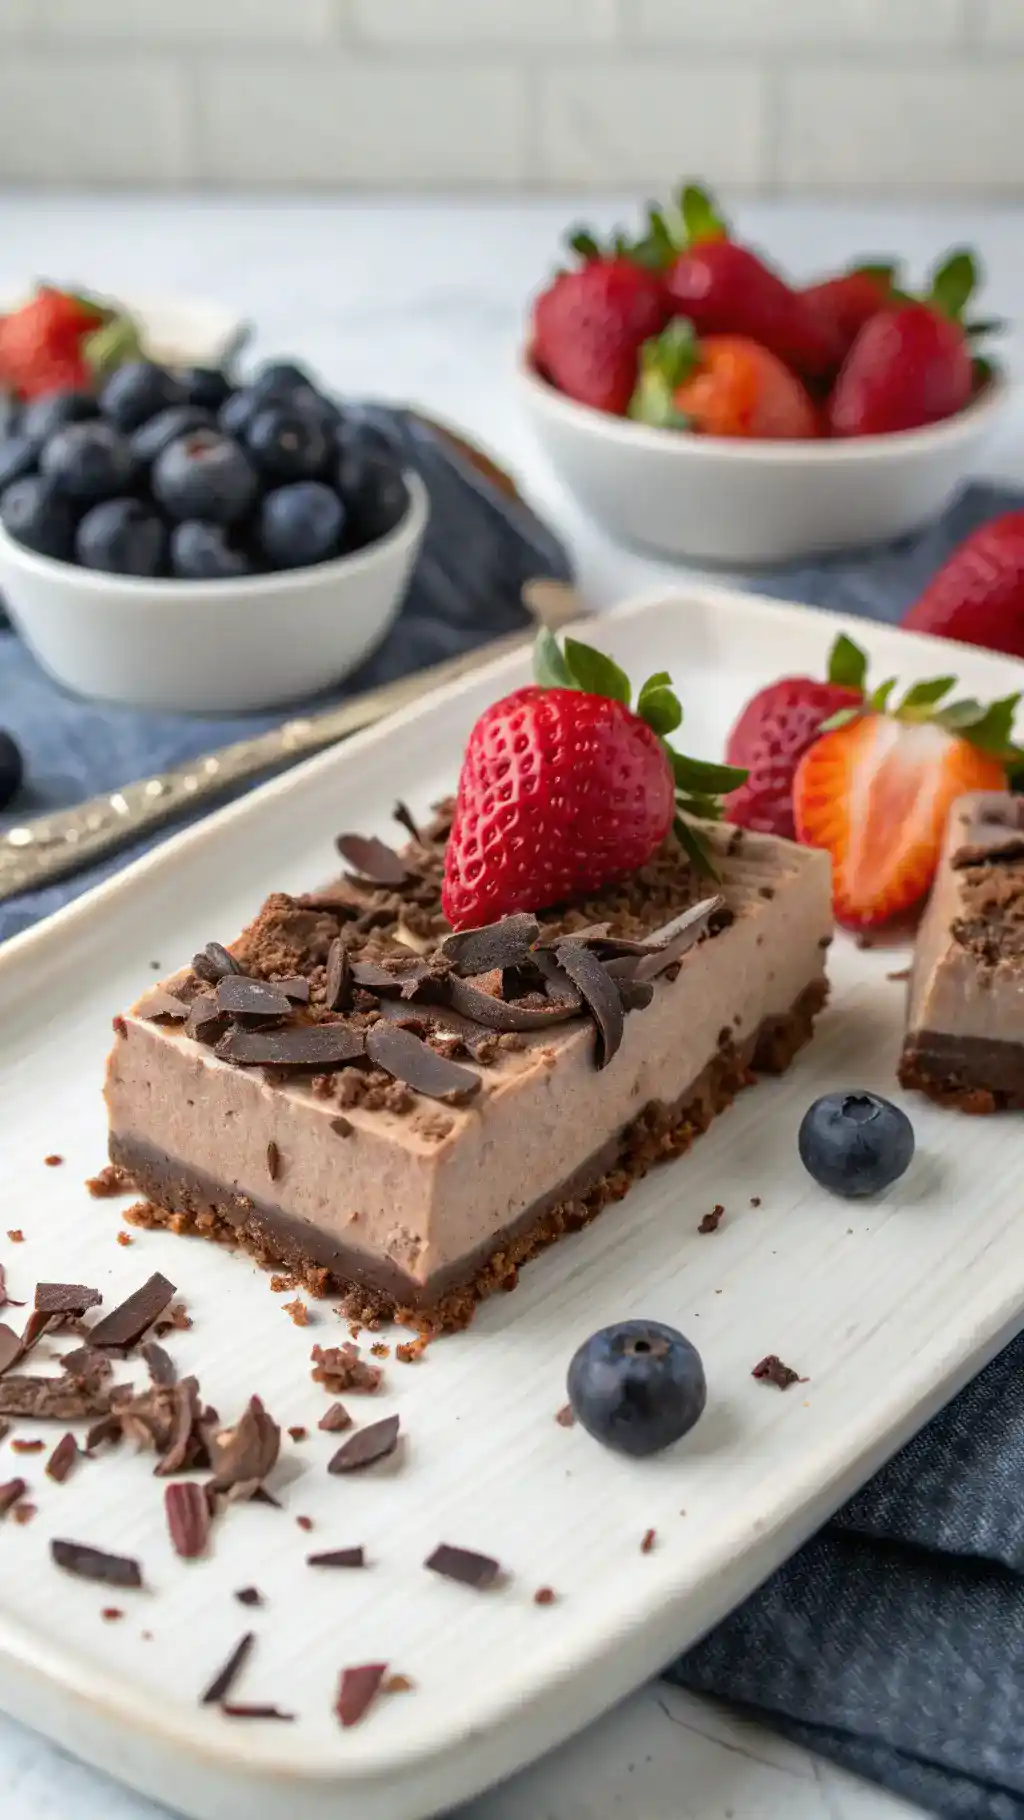
Imagine sinking your fork into a creamy, velvety layer of chocolate bliss, perfectly balanced with a hint of sweetness and a buttery graham cracker crust that crumbles just right. These Chocolate No-Bake Cheesecake Bars are a dream come true for any dessert lover! With rich cocoa and smooth cream cheese mingling together, each bite melts in your mouth, leaving you craving more. Plus, there’s no oven required, making it a breeze to whip up this delightful treat. Get ready to indulge in pure chocolatey happiness with every delicious slice!
Table of Contents
Why You’ll Love This Recipe
- Trust me, you’re going to love this creamy, dreamy texture!
- No baking means less mess and more time to enjoy!
- This one’s a game-changer for chocolate lovers everywhere!
- Perfect for any occasion—just slice and serve!
- Easy to customize with your favorite toppings!
Recipe Snapshot
| Feature | Details |
|---|---|
| Category | Side Dish |
| Cuisine | American-inspired comfort food |
| Prep Time | 10 minutes |
| Cook Time | 15 minutes |
| Total Time | 25 minutes |
| Dietary | Vegetarian |
| Serves | 4 |
| Best Served | Chilled and creamy |
Ingredients
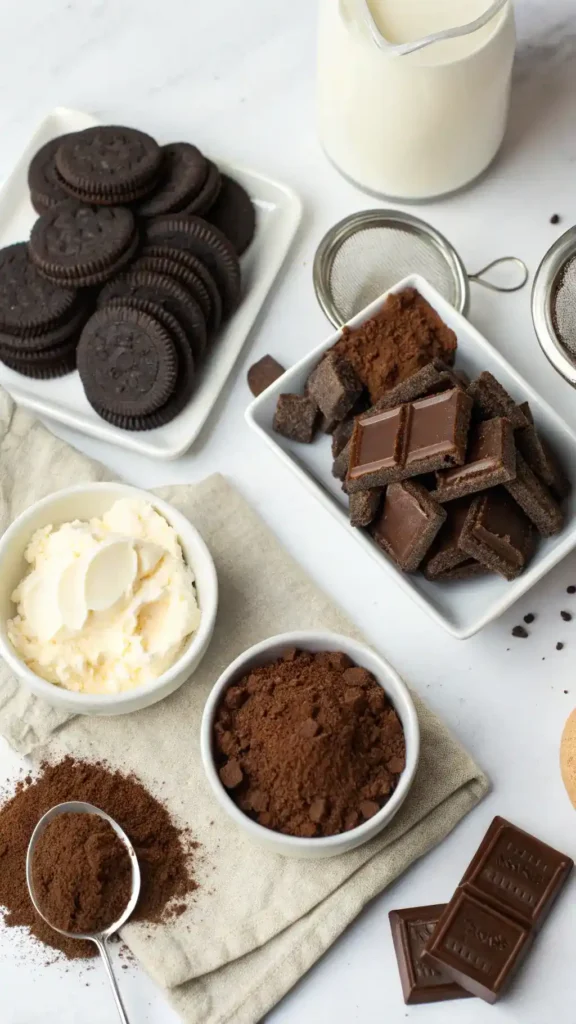
- Chocolate Cookies – for a deliciously crunchy base.
- Unsalted Butter – helps bind the crust together and adds richness.
- Cream Cheese – the star of the cheesecake filling, providing a creamy texture.
- Powdered Sugar – sweetens the filling without the graininess of granulated sugar.
- Vanilla Extract – enhances the overall flavor of the cheesecake.
- Cocoa Powder – adds a rich chocolate flavor to the filling.
- Heavy Whipping Cream – for a light and fluffy texture in the cheesecake.
- Chocolate Chips – optional, for extra chocolatey goodness and garnish.
Ingredients with measurements will be right under the article in the recipe card.
How to Make the Recipe
Get ready to whip up some delicious Chocolate No-Bake Cheesecake Bars with these easy steps!
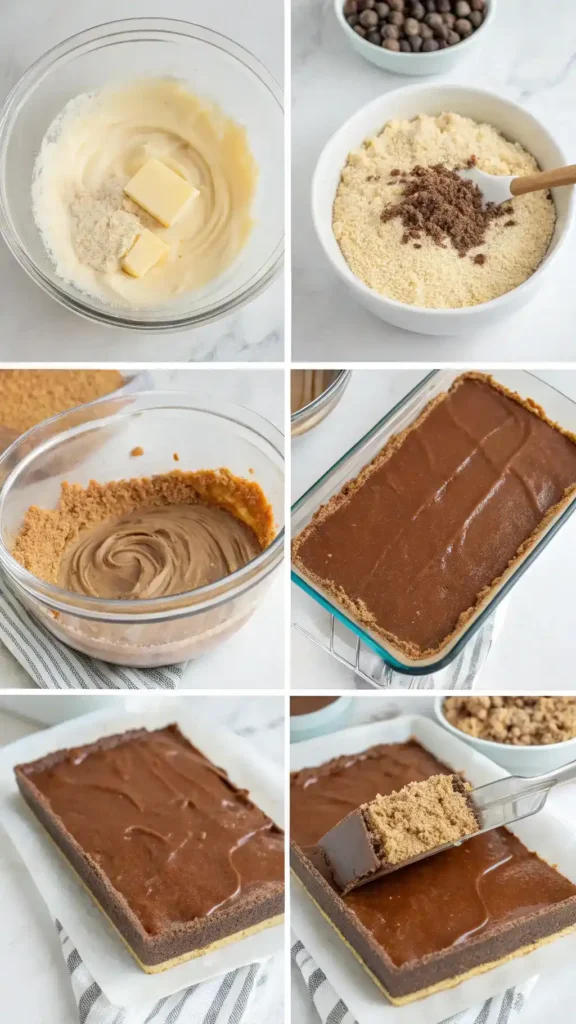
Step 1: Prepare the Crust
In a mixing bowl, combine crushed graham crackers and melted butter. Stir until well mixed. Press the mixture firmly into the bottom of a lined baking dish. Chill in the fridge while you make the filling.
Step 2: Make the Cheesecake Filling
In a large bowl, beat cream cheese until smooth. Gradually add powdered sugar and cocoa powder, mixing until combined. Pour in vanilla extract and mix again.
Step 3: Add Whipped Topping
Gently fold in the whipped topping until fully incorporated. This will give your cheesecake a light and fluffy texture.
Step 4: Assemble the Bars
Spread the cheesecake filling evenly over the chilled crust. Smooth the top with a spatula for a nice finish.
Step 5: Chill and Set
Cover the dish with plastic wrap and refrigerate for at least 4 hours, or until set. Patience is key here!
Step 6: Slice and Serve
Once set, lift the bars out of the dish using the parchment paper. Slice into squares and enjoy your delightful creation!
Pro Tips for Making the Recipe
•Use room temperature cream cheese for a smoother texture.
•Chill the bars for at least 4 hours to set properly.
•Add a pinch of salt to enhance the chocolate flavor.
•Experiment with different toppings like crushed nuts or berries.
•For a richer taste, use dark chocolate instead of milk chocolate.
How to Serve
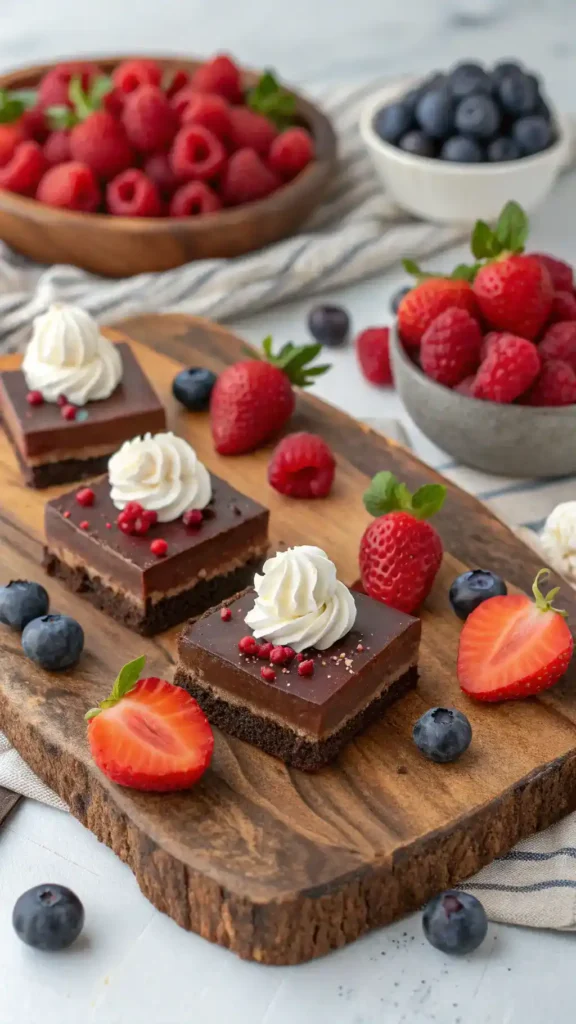
- Top with fresh berries for a burst of flavor.
- Drizzle with chocolate or caramel sauce for extra sweetness.
- Serve with a dollop of whipped cream for a creamy finish.
- Pair with a scoop of vanilla or coffee ice cream for a delightful contrast.
- Garnish with mint leaves for a refreshing touch.
- Enjoy with a cup of hot cocoa or a chilled glass of almond milk.
- Slice into bite-sized pieces for easy sharing at parties.
- Sprinkle with crushed nuts for added crunch and texture.
Make Ahead and Storage
Storing leftovers properly ensures your Chocolate No-Bake Cheesecake Bars stay fresh and delicious.
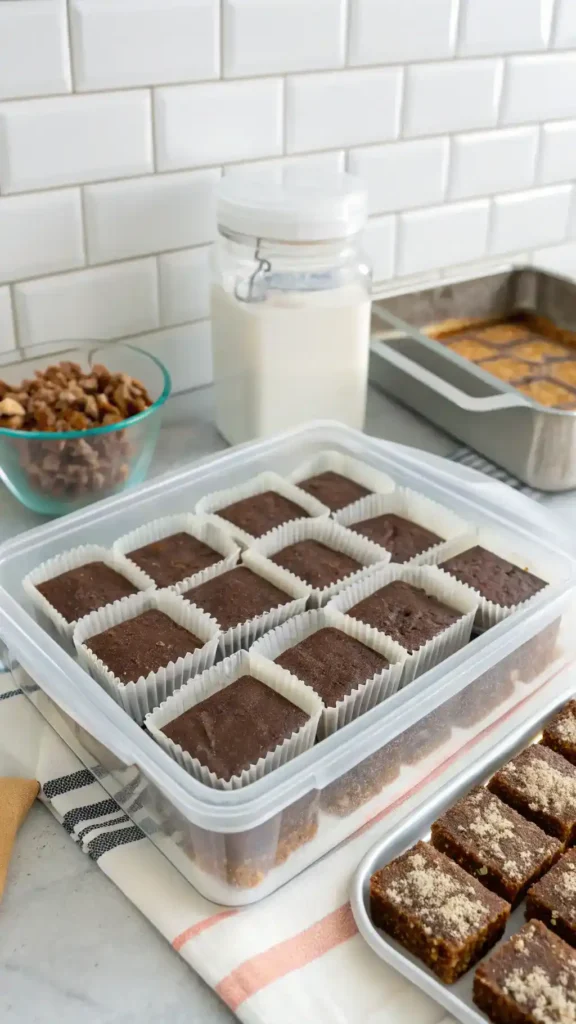
Storing Leftovers
Follow these tips to keep your bars tasty:
- Wrap individual bars in plastic wrap.
- Place wrapped bars in an airtight container.
- Store in the refrigerator for up to 5 days.
Freezing
To freeze your cheesecake bars while maintaining quality:
- Wrap bars tightly in plastic wrap.
- Place wrapped bars in a freezer-safe container.
- Label with the date and freeze for up to 2 months.
Reheating
For the best texture and taste when reheating:
- Thaw bars in the refrigerator overnight.
- Serve chilled for optimal flavor.
- Avoid microwaving to maintain texture.
FAQs
Can I use a different type of chocolate for the cheesecake bars?
Absolutely! You can use dark chocolate, milk chocolate, or even white chocolate depending on your preference. Just remember to adjust the sweetness if you’re using a sweeter chocolate.
How long do these cheesecake bars need to set in the fridge?
For the best results, let your cheesecake bars chill in the fridge for at least 4 hours, or overnight if possible. This helps them firm up and enhances the flavors.
Can I make these cheesecake bars gluten-free?
Yes, you can easily make these bars gluten-free by using gluten-free graham crackers or a suitable alternative for the crust. Just check the labels to ensure they meet your dietary needs.
What can I use instead of cream cheese?
If you’re looking for a substitute, you can use mascarpone cheese or a dairy-free cream cheese alternative. Both will give you a creamy texture while keeping the flavor delicious!
Chocolate No-Bake Cheesecake Bars
Equipment
- 1 Mixing Bowl For combining ingredients.
- 1 Baking Dish Lined with parchment paper.
Ingredients
Crust
- 1 cup Chocolate Cookies For a deliciously crunchy base.
- 1/2 cup Unsalted Butter Helps bind the crust together and adds richness.
Filling
- 8 oz Cream Cheese The star of the cheesecake filling.
- 1/2 cup Powdered Sugar Sweetens the filling without graininess.
- 1 tsp Vanilla Extract Enhances the overall flavor.
- 1/4 cup Cocoa Powder Adds a rich chocolate flavor.
- 1 cup Heavy Whipping Cream For a light and fluffy texture.
- 1/2 cup Chocolate Chips Optional, for extra chocolatey goodness.
Instructions
Prepare the Crust
- In a mixing bowl, combine crushed chocolate cookies and melted butter. Stir until well mixed. Press the mixture firmly into the bottom of a lined baking dish. Chill in the fridge while you make the filling.
Make the Cheesecake Filling
- In a large bowl, beat cream cheese until smooth. Gradually add powdered sugar and cocoa powder, mixing until combined. Pour in vanilla extract and mix again.
Add Whipped Topping
- Gently fold in the whipped topping until fully incorporated for a light and fluffy texture.
Assemble the Bars
- Spread the cheesecake filling evenly over the chilled crust. Smooth the top with a spatula for a nice finish.
Chill and Set
- Cover the dish with plastic wrap and refrigerate for at least 4 hours, or until set.
Slice and Serve
- Once set, lift the bars out of the dish using the parchment paper. Slice into squares and enjoy your delightful creation!
Final Thoughts
There you have it—Chocolate No-Bake Cheesecake Bars that are as easy to make as they are delicious! Picture yourself sharing these delightful treats with friends or savoring them solo after a long day. The creamy chocolate goodness is sure to bring a smile to your face. So grab your ingredients, whip up this simple recipe, and indulge in a sweet moment of joy. You deserve it!